QuickOPC User's Guide and Reference
Making a first OPC UA application using Live Binding in WPF
|
WPF design-time features are not available in QuickOPC version 2023.2. This affects the ability to use Visual Studio to configure Live Binding in WPF applications, and to configure properties of QuickOPC WPF controls. You can still use XAML editing to configure properties of QuickOPC WPF controls. QuickOPC version 2023.2 still fully supports WPF in run-time, i.e. the functionality of QuickOPC WPF controls in run-time is not affected, and also existing applications that use WPF Live Binding run correctly. We are evaluating the feasibility of supporting the WPF design-time features in a future version. |
Install QuickOPC. Make sure that you have selected an installation choice that includes .NET development.
Start Microsoft Visual Studio, and create new Visual C# or Visual Basic project, selecting “WPF App (.NET Framework)” template. Make sure that in the lower part of the “New Configure your new project” dialog, the framework is set to “.NET Framework 4.7.2” or later.
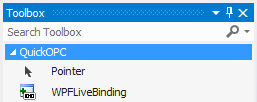
Drag the WPFLiveBinding component from the “QuickOPC WPF” tab of the Toolbox to the window’s design surface.
If the needed components do not show in the Toolbox: See Troubleshooting the Visual Studio Extension.
A Component Tray Editor dialog with an empty list of components will appear.
In the Component Tray Editor dialog, press the button. A Toolbox Items dialog will appear:
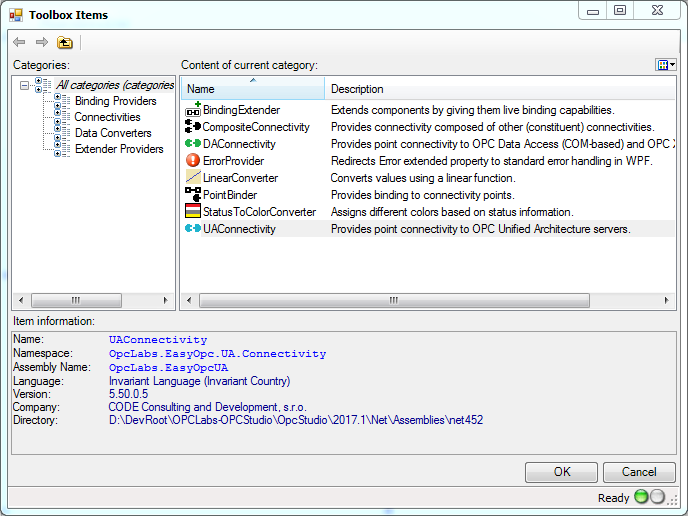
Select the UAConnectivity component from the Content of current category list of the Toolbox Items dialog, and press .
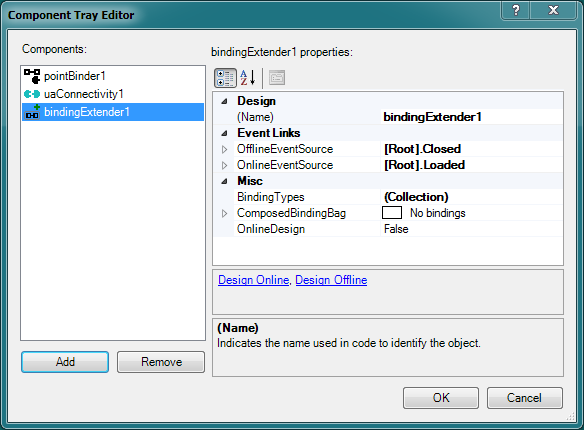
Notice that three entries will appear in the Components list in the Component Tray Editor: One labeled “uaConnectivity1”, the second labeled “pointBinder1”, and the third labeled “bindingExtender1”:
In the Component Tray Editor dialog, press the button.
Drag a standard TextBox from the Visual Studio Toolbox to the designed window.
Right-click on the text box control on the designed window, and choose “” command.
Alternatively, you can select the text box control first, and then expand the Live Binding category in the Properties windows, and next to the Live.Extensions property, choose the “” command there.
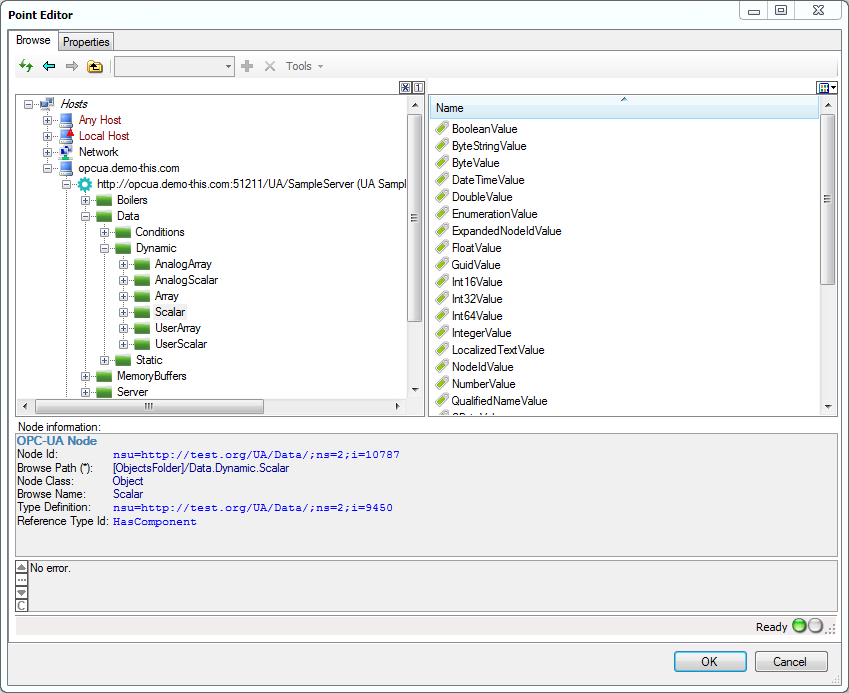
In the “Point Editor” dialog, select Hosts -> opcua.demo-this.com -> opc.tcp:// opcua.demo-this.com:51210/UA/Sample Server (UA Sample Server) -> Data -> Dynamic -> Scalar -> Int32Value, and press .
Build and run your application. You will see live OPC-UA data changing in the text box. It is also possible to verify the effects of live binding without building the application: Right-click anywhere in the designed window area, and select the command (this is an on-off command, with "on" state indicated by a check mark next to the menu item). Alternatively, expand the Live Binding category in the Properties window, and next to the Live.Extensions property, check the Online Design Live Binding box. This will cause Visual Studio to perform the live binding immediately. Use the same command to revert back to normal mode.